.png)
How to turn Facebook comments into customers with UChat

Facebook posts can be used for a lot of things. Creating awareness for your brand, getting new leads, provide customer support.
The issue is that it takes an incredible amount of time to reply to everyone who comments on your page. Even more so follow-up with those commenters.
The solution is to automate this process entirely by letting the chatbot reply to those people for you and sending them a pm with a follow-up message of your choice.
And it is very easy to set up. We will walk you through it step-by-step.
Creating the Facebook post
The very first step we need to make is to create a Facebook page on your page so that we can enable the comment trigger on.
A few things to take into account when creating the post itself. The first thing is making sure that you guide the user in commenting in the commenting section.
The chatbot will be monitoring the comments on a post, and only activate when a comment comes in.
So your post copy will need to make that very clear.
Another thing you need can implement is telling the user what they need to reply with. In some instances you might want them to type a certain keyword to trigger the flow you want to be sent by PM.
Here is an example of how such a post could look like;
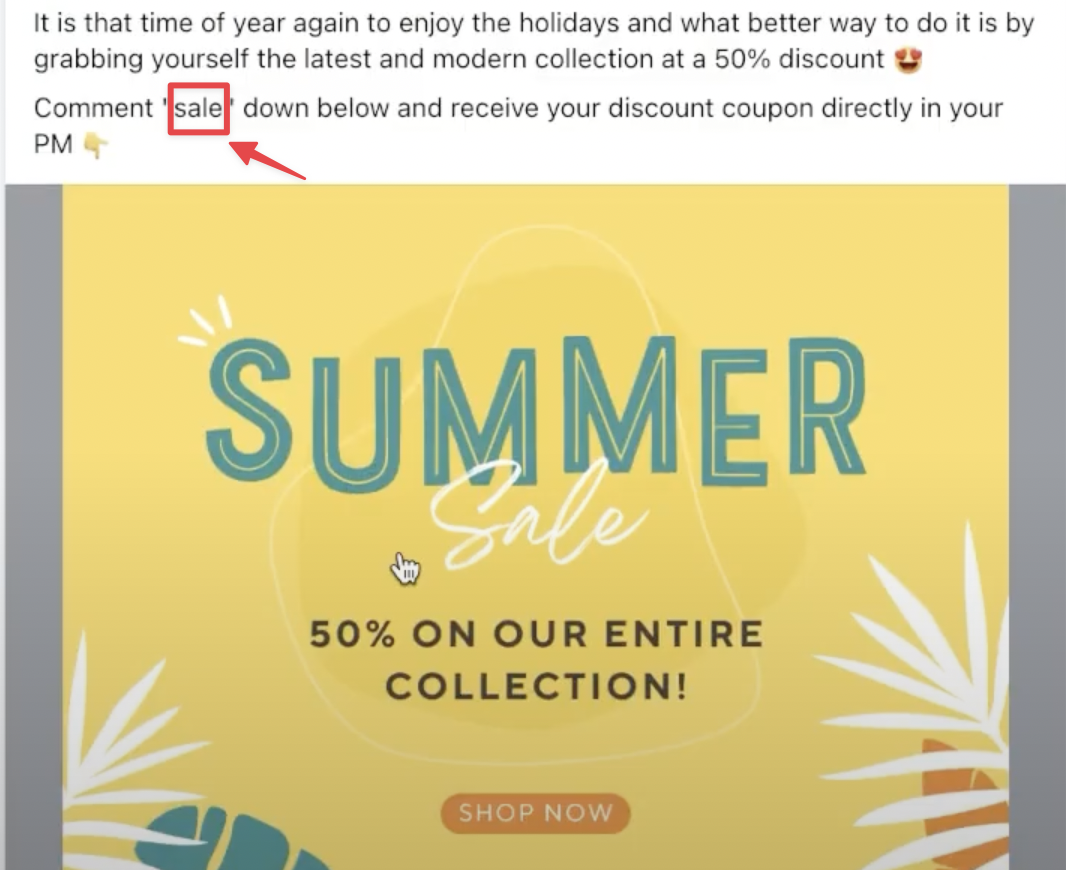
As you can see the text copy of the post itself contains the 2 elements needed to guide the user what to do:
- Comment below the post
- Comment with a specific keyword
This makes it clear to anyone reading the post and wanting to get that 50% discount offer to comment.
Take a look at the below video for a complete overview on the above topic;
Creating the opt-in flow
Now it is time to start creating the opt-in flow that the chatbot will sent by pm to the person commenting on the post.
To do so just go to the flows section from the left-hand menu and press the button in the top-right to create the new subflow

When creating the actual opt-in flow there are a few things you need to take into account;
- The initial message can only 1 text message
- It is best to not include variables like first name as it is known to be the failure of sending these opt-in messages
- Add a button the user can interact with
- Do NOT auto-continue to the next block or step in your flow
The reason for the above restrictions are in place because the person who commented might not be a subscriber to your chatbot yet. This means the first message you are sending acts like an opt-in basically.
Once a user interacted with this initial message, you are free to continue any way you like as that person became a subscriber.
Full overview on how to create this opt-in flow can be followed here;
Creating the comment trigger
Now comes the fun part as we are going to create the actual comment trigger. This will allow the chatbot to watch for comments onto your selected post and reply if it matches your preferences.
To create a comment trigger go to the left-hand menu and select Automation -› then choose the tab named as "Comment Keywords".

Just press the button in the top-right corner named "+ New Comment Keyword"
From here you will get to the overview from where you can set up your trigger.
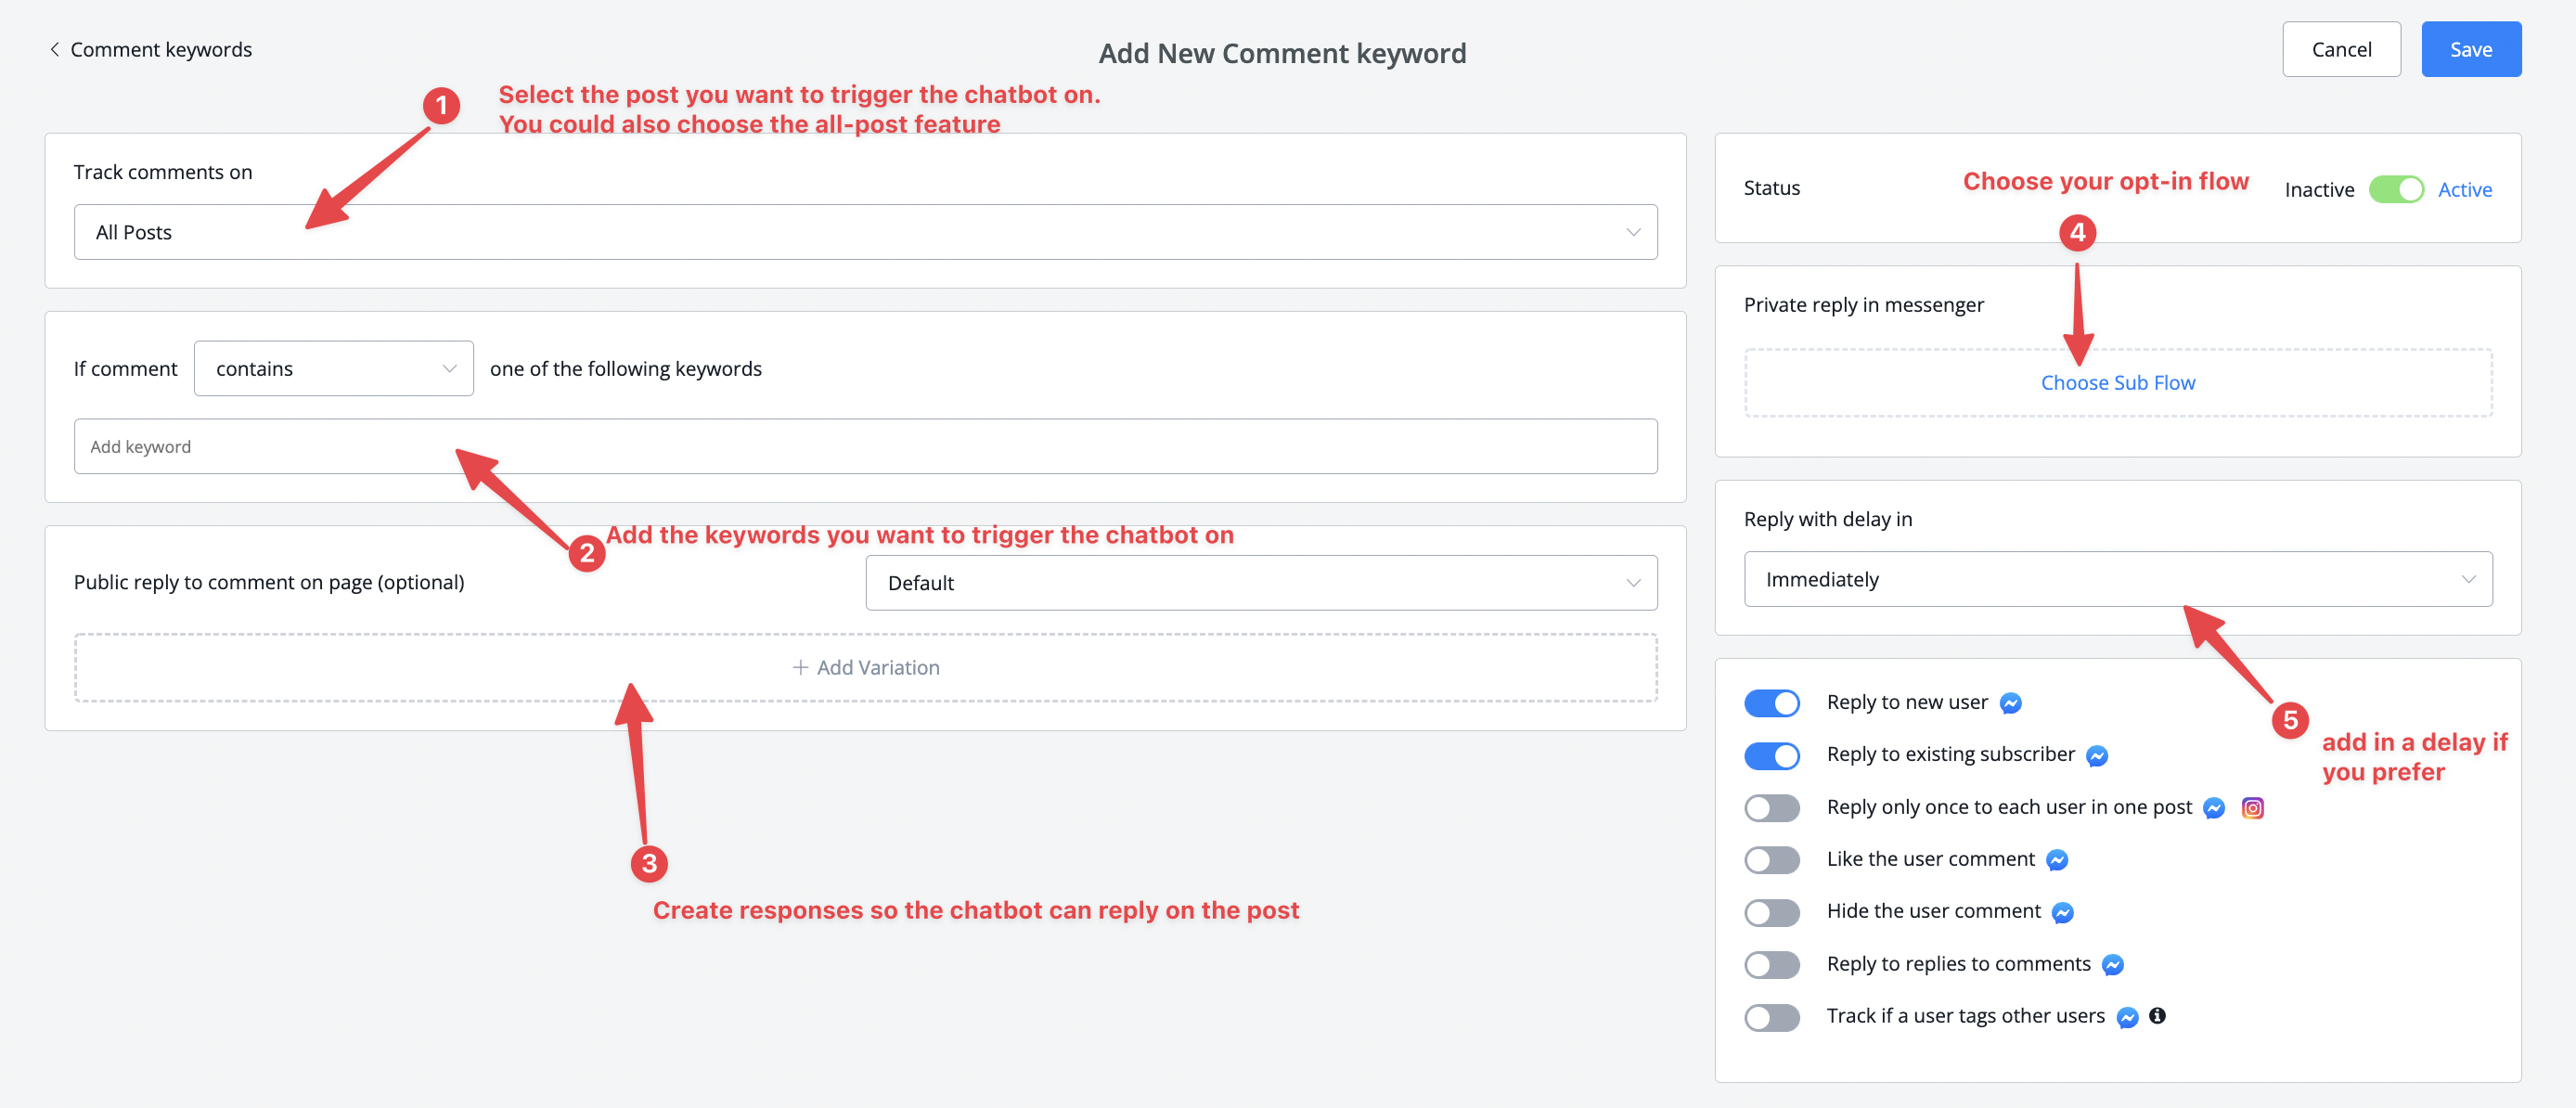
Lastly you have some options to choose from as liking the user comment, hiding a users comment and so on. Press save once done.
If you would like a more in-depth overview watch the below video;
Testing the trigger
Now comes the time to test if your comment trigger is setup correctly and to troubleshoot any issues that may result in the trigger not working.
Let's head over to the Facebook post and comment with the keyword we asked the users to comment with in the comment section.
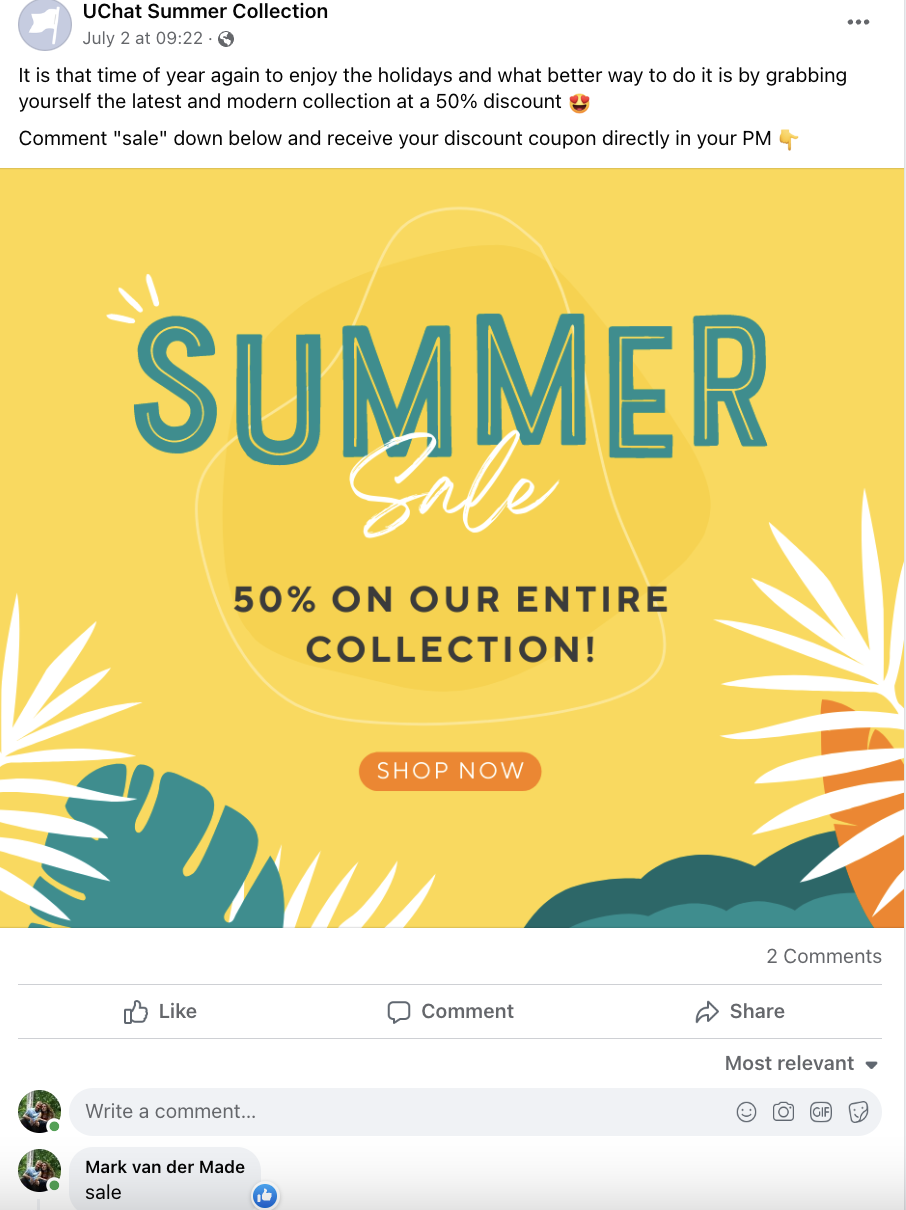
As you can already see, the comment has been liked by the chatbot on behalf of the page and few seconds later you will also see the reply coming in;
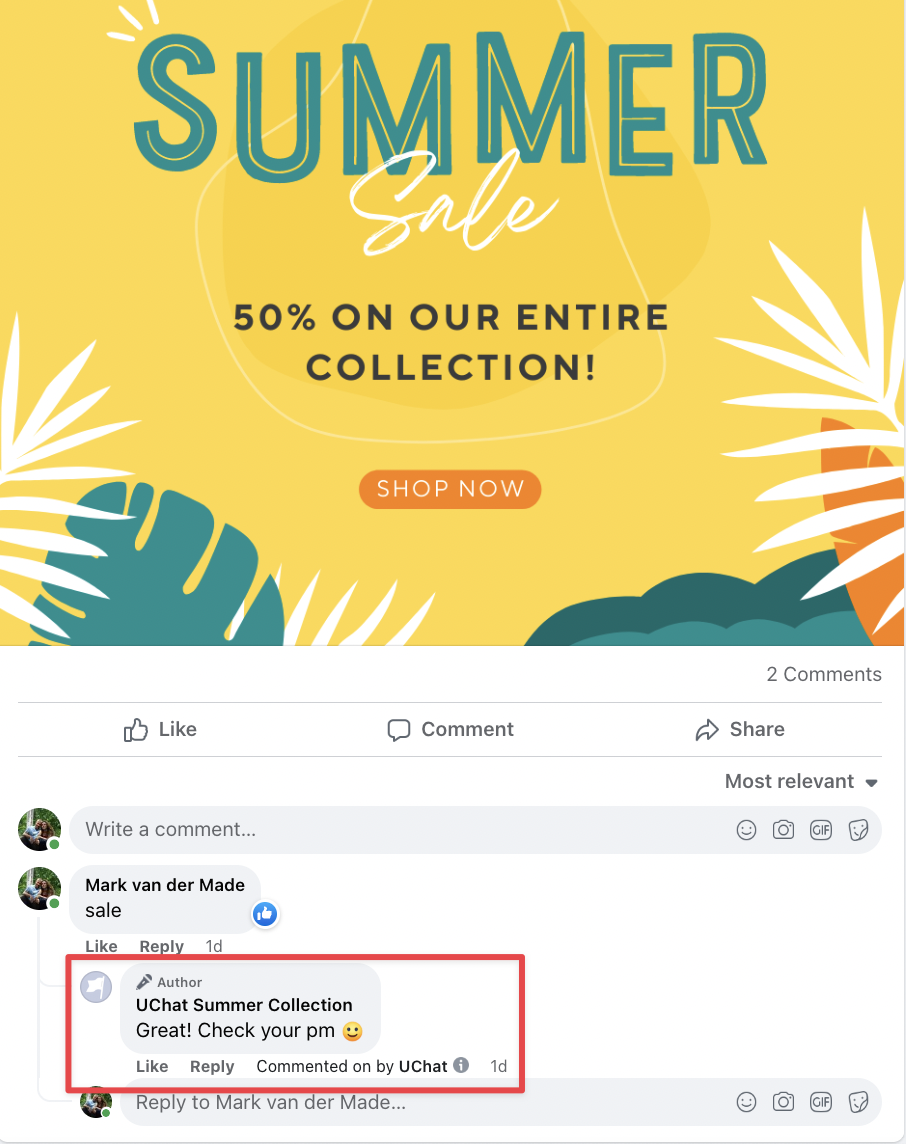
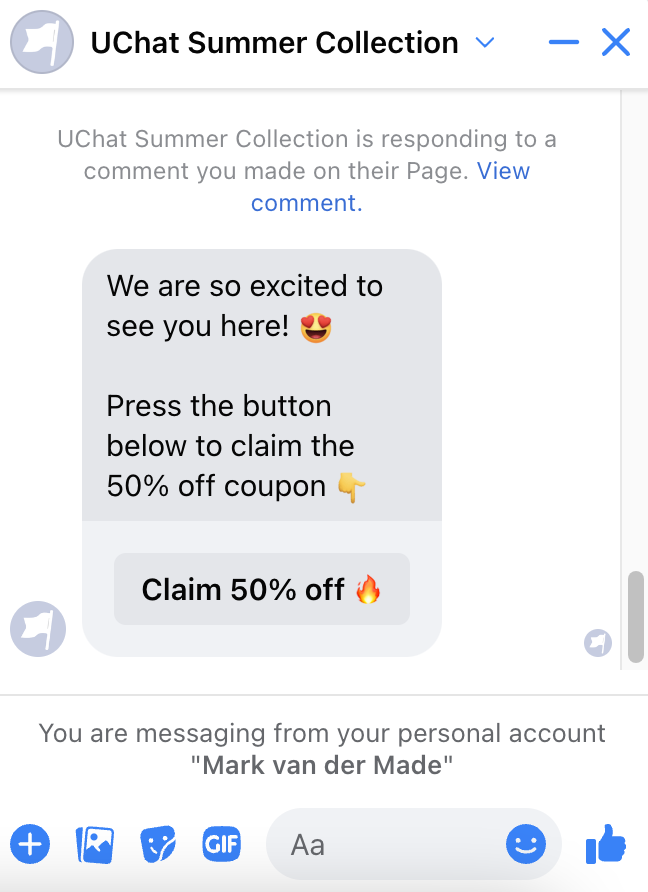
At the same time you will also get the pm from the chatbot containing the opt-in message we set up earlier;
Ready to get started?
Building chatbot is fun & easy with UChat, Start your 14 days free trial, access to all pro features, no credit card required!
Start your 14 day Free Trial


.jpg)


